jQueryライクに3D空間を作れるライブラリtQuery
jQueryライクに3D空間を作れるライブラリtQuery
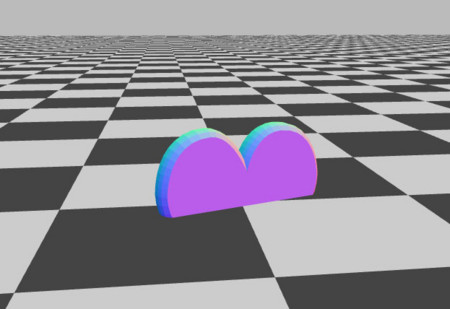
tQuery API - extensions for three.jsで簡単に3D空間を作ってみました。

<!doctype html>
<title>Minimal tQuery Page</title>
<script src="tquery-bundle.js"></script>
<script src='tquery.checkerboard.js'></script>
<script src="tquery.shape.js"></script>
<script src="tquery.shape.create.js"></script>
<body>
<script>
	var world	= tQuery.createWorld().boilerplate().start();

	tQuery.createCheckerboard({
		segmentsW	: 100,	// number of segment in width
		segmentsH	: 100	// number of segment in Height
	}).addTo(world).scaleBy(100);

	shape	= tQuery.createHeartShape();
	shape.extrude().toMesh().id('obj').addTo(world);

	tQuery('#obj')
		.geometry().computeAll().normalize().center().rotateZ(Math.PI).back();

	tQuery.world.hook(function(delta){
		tQuery('#obj').rotateY(90 * delta * Math.PI / 180);
	});
</script>
</body>
ライト関係もあるらしい・・・
Canvasにランダムな点
Canvasにランダムな点を描く方法
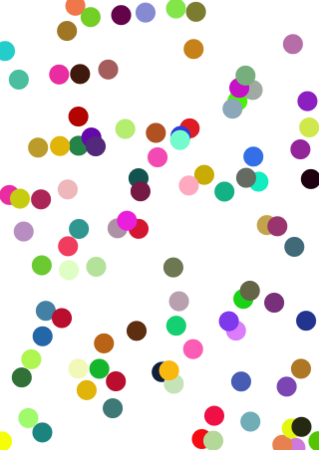
canvasをjQueryライクに扱えるjCanvas | jQuery meets the HTML5 canvasを使ってcanvasにランダムな色の点を書いてみました。

var canvas = $("canvas");
var width = canvas.width();
var height = canvas.height();
for( var i = 0 ; i < 100 ; i ++ ){
  canvas.drawArc({
    draggable: true,
    fillStyle: "#" + Math.floor(Math.random() * 0xFFFFFF).toString(16),
    x: width*Math.random(), y: height*Math.random(),
    radius: 10
  });
}
分かりやすくて便利っすねえ
CSS3とjQueryでアコーディオン
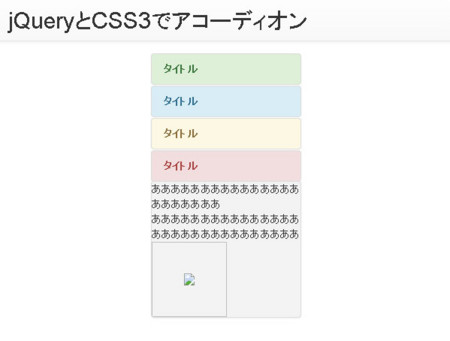
CSS3アニメーションを使って、アコーディオンを実現します。
jQueryのslideDownよりも幾分、なめらかに動作するかと思います。

サンプルはこちら
http://moeten.info/js/20140908_cssSlide/
メインのソースはこちら
css
dd{
  overflow-y: hidden;
  opacity: 0;
  max-height: 0;
  transition-property: all;
  transition-duration: 1s;
  transition-timing-function: cubic-bezier(0, 1, 0.5, 1);
}
dd.open{
  opacity: 1;
  max-height: 200px;
}
javascript
$(function() {
  $("dl dt").click(function(){
    $("dd").removeClass("open");
    $("+dd",this).addClass("open");
  });
});
html
<dl>
  <dt>タイトル</dt>
  <dd>内容内容内容内容内容内容内容内容内容内容内容内容内容内容内容内容内容内容内容</dd>
  <dt>タイトル</dt>
  <dd>内容内容内容内容内容内容内容内容内容内容内容内容内容内容内容内容内容内容内容</dd>
  <dt>タイトル</dt>
  <dd>内容内容内容内容内容内容内容内容内容内容内容内容内容内容内容内容内容内容内容</dd>
  <dt>タイトル</dt>
  <dd>内容内容内容内容内容内容内容内容内容内容内容内容内容内容内容内容内容内容内容</dd>
</dl>
Apacheからnodejsのリッスンサーバーポートにマッピングさせる
Apacheからnodejsで起動したサーバーポート3000にマッピングさせます。
Apacheの設定ファイルの編集
設定ファイルを編集します。
emacs /etc/httpd/conf/httpd.conf
下記項目を追記します。
NameVirtualHost *:80
<VirtualHost *:80>
  ServerName example.com #←利用ドメインの指定
  <Location />
    ProxyPass http://localhost:3000/
    ProxyPassReverse http://localhost:3000/
  </Location>
</VirtualHost>
Apacheのリスタート
apachectl restart
あとは、httpd.conに指定したexample.comにブラウザでアクセスすればlocalhost:3000にマッピングされます。
WindowsのPhpStormでLess

WindowsのPhpStormでLessを使用する方法です。
nodejsのインストール
まずは、nodejsをダウンロードしてインストールを行います。
node.js
※インストールすると使えるnodeやnpmコマンドは結構使用しますので、環境変数pathに追加しておくと、コマンドプロンプトのどこにいても呼び出せるので便利です。
プログラム環境の構築:パスの通し方
phpstromでwatch(監視)させる
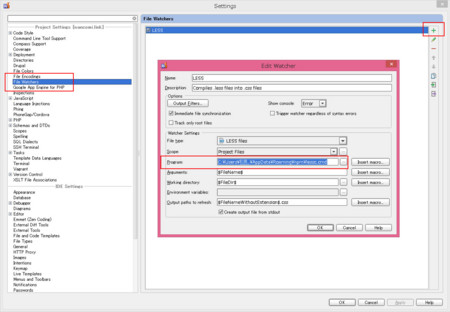
File->Settings->File Wathersで+LESSを選択し、Programの項目に
C:\Users\ログインユーザー名\AppData\Roaming\npm\lessc.cmd
を指定します。

あとは、lessファイルを作成し、保存する度に、cssファイルが自動で吐き出されます。
